It’s been a hectic spring, and as we approach the end of school in fewer than 8 days, we are busier than ever. Of late, we’ve had a tendency to overthink what to post, instead of just sharing the many good things that we do with our students to promote making thinking visual. To that end, we thought we’d share in this post some of the sketchnotes that our students completed this year.
ASIDE 2017
One of the things we try to do is steer clear of just filling in worksheets and graphic organizers; instead, we want our learners to design their own organizational structures of information. We did this with our digital citizenship pledge this year. The students visually designed their own pledges. This approach let them focus on the content and create a graphic display of what it means to be a good digital citizen.
ASIDE 2017
Since our students routinely use sketchnotes in a variety of subjects and on multiple grade levels, many of them include visual annotations, or doodles if you will, on their own as reference points. We see it in their notes and sometimes in the margins on an assessment.
A few other unique examples we wanted to share were completed in a lesson about the different types of primary sources. Ask any student about where they can find primary source information, and most will say books and the Internet.
ASIDE 2017
This sketchnote activity opens their eyes to the vast array of places to locate primary documentation and firsthand accounts of information. The examples in this post represent some of the unique ways our learners visually organize how they think about content.
Sketchnotes are used to give context to content, and this design process helps with comprehension and retention of material. It’s one more tool for helping students to make thinking visible.
The National Association Of Independent Schools (NAIS) 2017 Annual Conference just wrapped up in Baltimore, Maryland. The two days of sessions, speakers, and confabs all highlighted the evolving roles of schools and school leaders within the ever-competitive learning landscape.
We want to express our sincere thanks to the room full of educators who came to our Friday session, “Where Learning Meets Design: Taking Control Of The Visual Classroom.” The questions and ideas made for a terrific conversation about graphicacy and the importance of visual proficiency in both a student’s and a teacher’s toolkit.
All of the links, resources, and videos from our workshop are posted on our “Visual Classroom” website. The PowerPoint from our presentation is also now live on the page. If you happen to take a look at the slides and graphics, please feel free to get in touch with your feedback and additions.
We also appreciate the enormous encouragement from our school’s Headmaster and Director of Communications in supporting our trip. It was a real treat as well to see our former head from 15 years ago pop into the back of the session room.
The highlight of this year's conference was without a doubt the lively and thought-provoking talk by Sir Ken Robinson. With characteristic wit and insight, Robinson reminded us that children are learning organisms. They love the internalization of language and ideas, but they don’t always love “education.” This is because the nation's school systems operate on efficiency, not talent. They prioritize shared cultural knowledge, rather than the inner yearning for discovery.
Other speakers included Susan Cain and her ruminations about the power of introverts to change the world, as well as intriguing sessions that focused on data-driven assessments and alumni engagement. The most fun, however, came from the accidental hallway encounters with long-time friends and colleagues from across the country. These sorts of run-ins are what make this gathering so meaningful.
Obviously, we didn’t make it out of Baltimore without sampling some crab cakes. We recommend The Oceanaire for their super-fresh, super-local seafood. Also, BricknFire Pizza Co. in the Baltimore Marriott Inner Harbor makes the best caramelized onion and mushroom pizza we’ve ever had.
Thanks to all of the NAIS organizers for staging such a smooth conference. And if you weren’t able to attend this year’s symposium, follow the #NAISAC tag on Twitter for great on-sight reporting and resources.
Sketchnoting plays an integral part in our curricula, and we incorporate them whenever we can to help learners connect to content. This personal form of note-taking allows students to use the visual thinking process to design information in real-time through words and images. So it is with great pleasure that we recognize the inaugural, kick-off event for World Sketchnote Day. Follow the day on Twitter using the hashtag #SNDay2016 to see some amazing examples.
We've been huge fans of the process and have witnessed its extraordinary appeal to our students. While we encourage them to use sketchnotes whenever they choose, we often hear cheers of delight when we make it an active part of a lesson.
Source: ASIDE 2016
Our students understand that the
visual cues in the sketchnote process help them connect to the material and enhance their recall of the content. Visually engaging with the information broadens connections and opens up the design process to think about the relationships between text and image.
We've watched the evolution in how students use sketchnotes to visually organize their information and to create a structural framework for the content they are learning.
There are lots of resources available to educators, and one of the most comprehensive is Kathy Shrock's guide to using Sketchnoting In The Classroom.
For a quick reference to help our students, we
developed the one-page cheat sheet in this post as a handy guide to keep in their binders. Click here to download the PDF.
For other posts about sketchnoting in the classroom, please see:
Oh, what a year it’s been. It seems we flew through May without taking a breath as we worked through a myriad of projects. One of our favorites this spring was completed as part of the second grade social studies unit on communities. We collaborated with our colleagues Stefani Rosenthal (@StefRosenthal) and Jessica Raffaelle (@miss_raffaelle) to build a project-based learning unit to answer the question, "Where Do People Live?" More importantly, we wanted to build a visual vocabulary to help support the thinking process using sketchnotes, maps, and three-dimensional design.
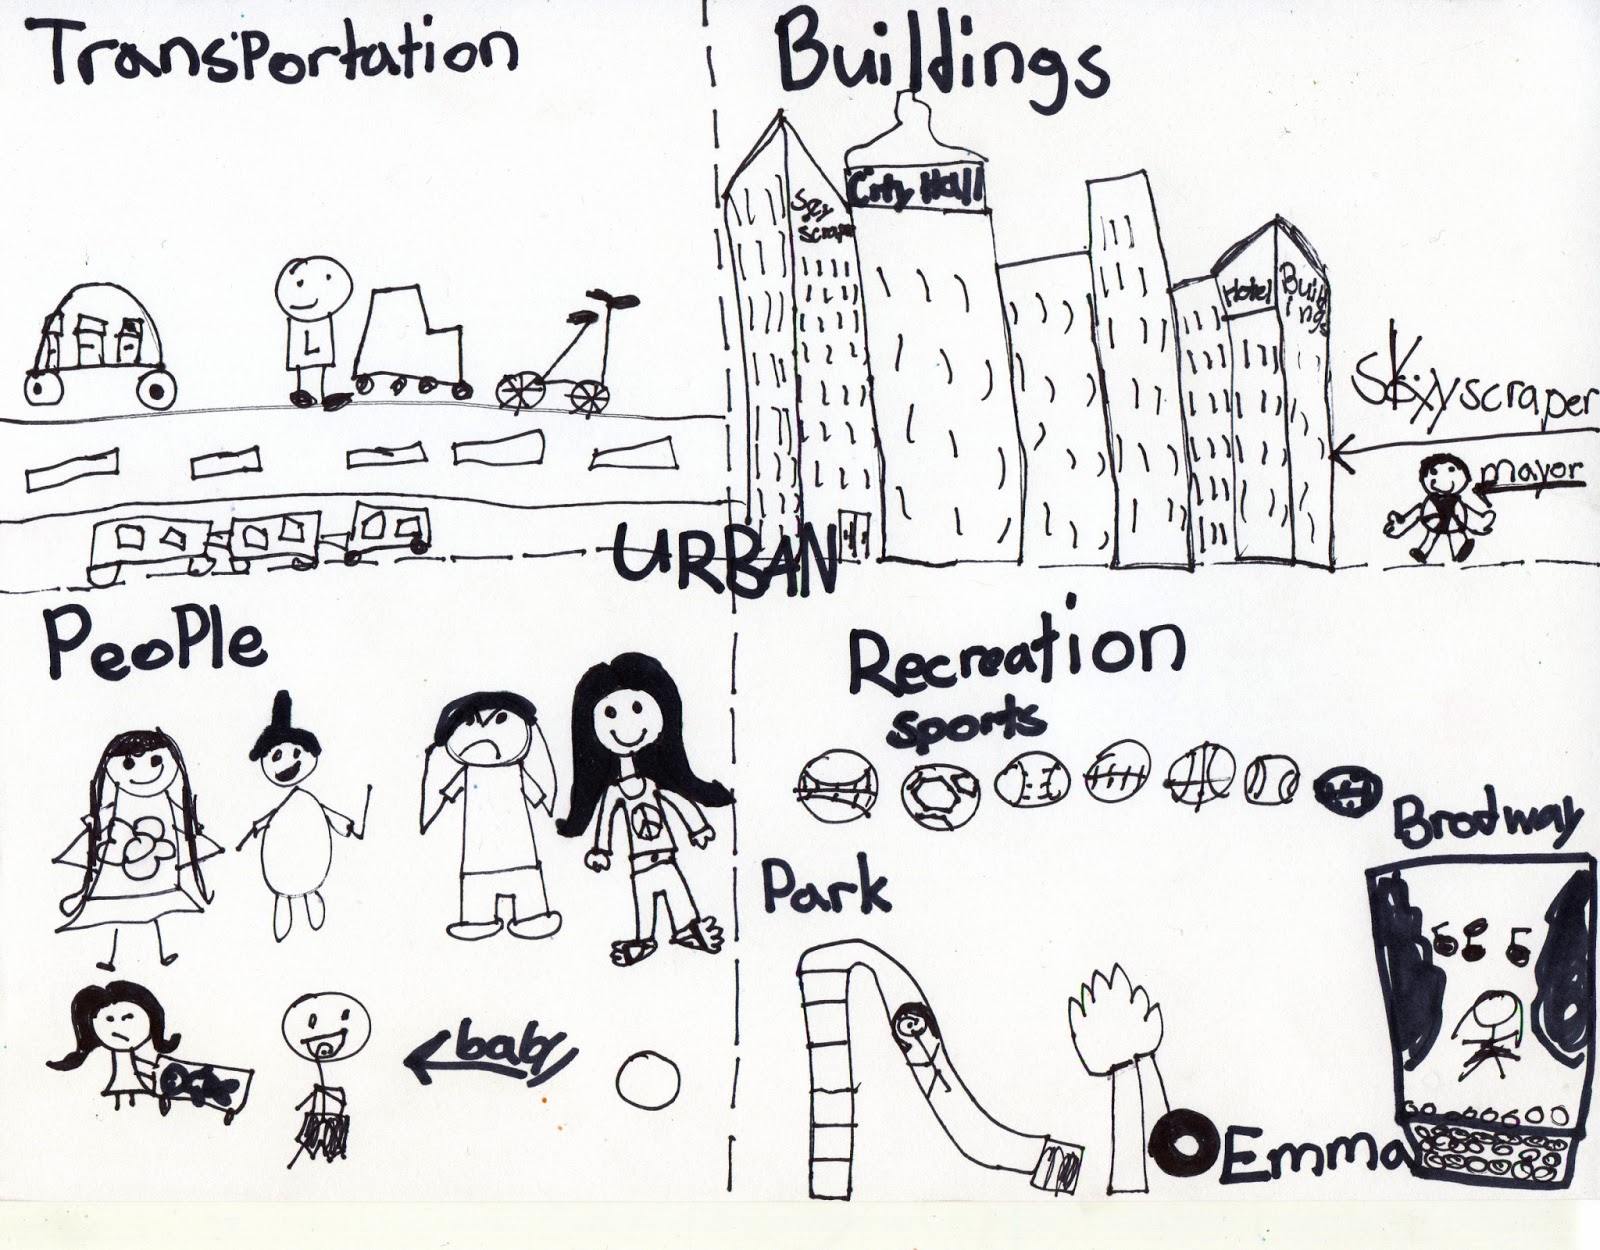
We introduced sketchnoting several years ago to educators at various grade levels. The second grade teachers never looked back. They’ve made it a staple in their toolkit ever since. The bulletin board image featured in this post represents the variety of visual thinking strategies that the learners employed to convey the different types of communities, including rural, suburban, and urban.
A closer look at the details in the sketchnotes provides a real sense of the selection process that most accurately represents what the students are thinking, not only in the types of visuals, but also in the arrangement of the descriptive information to help them fully grasp the content.
Source: 2nd Grade Students, 2015
In the next phase of the project, the students mapped out the different types of communities. They worked in groups, with each student making his or her own hand-drawn map and key. Each community contained certain must-haves, such as police and fire stations, but the land use from rural areas to urban cities made the maps quite different. It involved a lot of discussion and decision-making on their part as to how to design the roads, types of buildings, and homes.
Source: ASIDE, 2015
This involved a good deal of spatial awareness, and these charming two-dimensional maps with hand-drawn keys represent their visual acuity. The details are delightful, showing barns with silos, swimming pools in suburbia, and skyscrapers in the city. The students absolutely loved making these maps. They even took it upon themselves to add street names. With such strong maps as actual plans for the next step, it’s no wonder that the three-dimensional construction of these communities came out so well.
Source: ASIDE, 2015
The final piece to the project involved building the actual community in the new makerspace in the library. This took some planning and negotiation within the group, because they had to visually transfer a flat design into a three-dimensional environment. Occasionally, it was not without argument either. We allowed some latitude on this; it was important for them to figure it out for themselves.
In the end, they realized the first thing they needed was to lay out the road system. This help them visually see where they would need to place buildings, put in parks, provide for homes, etc. They traced the box bottom on the board, gave it a number, and then coded the bottom of the box with the same number. This made assembly of the final, painted boxes on the map easy. With a little Model Magic, the students added transportation, rooftop playgrounds, and tomato patches.
Source: ASIDE, 2015
Each phase of this project incorporated visual thinking skills that built upon the previous step. Threading the content through the various stages in the design process reinforced the essential question.
The students became independent photo journalists, taking aerial and detailed shots of the maps, and then wrote illustrated reports using the Nearpod app on their iPads. The last thing we did was to use an iPhone as a little drone that traveled through the entire map to take a video of the finished piece as a whole.
This project did more than just build a deeper understanding of the different types of communities. It fostered a stronger sense of community as a whole; the sense of pride and accomplishment on their faces was priceless.
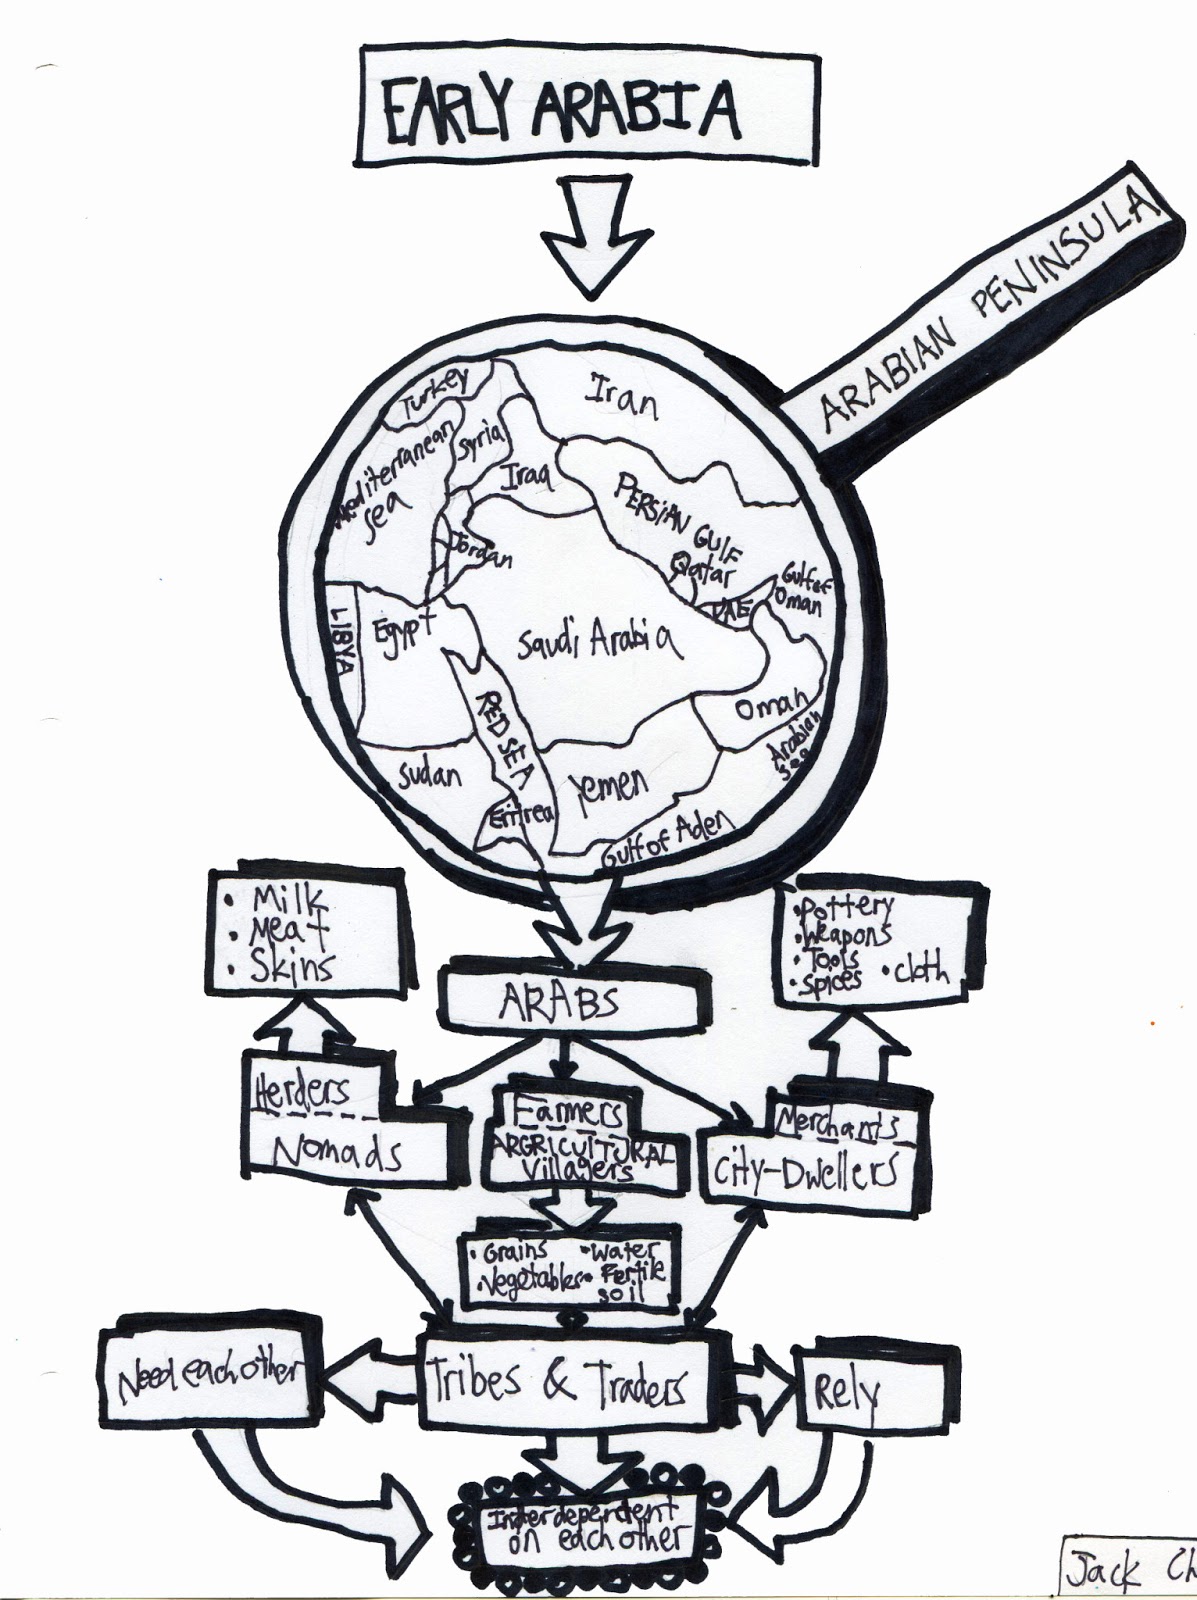
We’ve long been advocates for using sketchnotes with learners and have written many posts on how organizing information using visual cues forms a structural framework for ideas. The sketchnotes featured in this post were created by our fifth graders to answer the question, “What makes a civilization?”
Our students have grown to be quite particular about designing information by putting a good deal of personal selection into their work. For this reason, we wanted to find ways to use technology to publish their sketchnotes, not only as images, but also as a way to extend their understanding of the content.
To do this, the students combined a number of tech tools, including Kidblog, Thinglink, and Twitter, to write, design, and share their projects. They wrote the content in Kidblog to explain the basic features of a civilization as they related to the Sumerian culture of Mesopotamia. This was a perfect space for them to develop their ideas, get timely feedback, and publish their work.
Once the final content was completed, the kids photographed their sketchnotes using the iPad. For some of them, this was a process in and of itself. Since we constantly talk to them about presentation, we insisted that they learn to control the device to take straight and accurate photographs that could be cropped for the best possible way to enhance the overall appearance.
They uploaded their sketchnote images to use in Thinglink and created the hot spots by copying the information they published on Kidblog. Having the content edited and published ahead of time allowed the students flexibility in designing their Thinglinks. When these were finished, the students used Twitter to share their work with the class.
This project, like others we've done, fall into the category we call DLIT (design, literacy, information, and technology). It combined multiple layers of information designed by hand and on a device with technologies that included the use of a digital photograph, web application, app, and social media. Employing an array of different tools provided the students with more than one way to display what they'd learned, and it made them more nimble users of technology.
Using sketchnotes with our students this year exceeded our expectations. Whether it was with second graders studying communities, or third graders sketchnoting about the rainforest, the results were the same. With our fourth grade, we used sketchnotes to categorize the types of primary sources. The students displayed the same excitement in collecting notes in a different way that included images as visual clues.
We started with an introduction to the three basics of sketchnoting, which are to create an
organizational structure for the content, to use a font hierarchy to
elevate the importance of text, and to draw simple sketches to connect to the notes. We stressed that each person's sketchnotes would be different, because it had to do with an individual's point of view. It was a personal approach to their way of making the information memorable. They loved the idea of choice in designing the content that best suited them.
Source: 4th Grade Sketchnotes, ASIDE, 2013
It was no surprise to see them jump right into the sketchnote process. It was equally amazing to see how this method once again reinforced the learning. The students' recall about primary sources was evident throughout the semester, long after their sketchnotes were completed.
They not only remembered the various categories that primary sources fall into, such as published, unpublished, oral, and visual, but they also understood the wide range of places to find information. It opened their eyes to over 70 types of primary sources that can help with historical research.
Source: 4th Grade Sketchnotes, ASIDE, 2013
As a culminating piece to this lesson, the students bring to class their own primary sources from home. Again, it's their choice, and the types of items include birth certificates, library cards, trophies, diaries, photographs, movie tickets, and more.
For fun, we make believe we are at a conference of historians, 100 years later, who are trying to figure out what these items actually tell us. The kids get a kick out of it. At the same time, it makes them realize how difficult it can be to decipher information depending on the type of primary source.
Since we have a school archive, we also take the students to see some of the older artifacts and documents about the school. They are fascinated by the memorabilia and try to use the skills they learned to decode what they are seeing. It makes it real.
Source: 4th Grade Sketchnotes, ASIDE, 2013
For other examples of sketchnoting, please see our other posts.
We’ve written a number of posts about sketchnotes,
and this year we pushed to include them as part of the note-taking
process on multiple grade levels. Most recently, our third graders
practiced sketchnoting to visually map out their understanding of the
rain forest.
As with other age levels, the first plunge into using this new way of note-taking needed
some instruction to help them understand the process. Their initial reluctance
soon gave way to enthusiasm as they realized they were free to
make decisions as to how to arrange the information to best suit their ways of learning.
Source: 3rd Grade Sketchnotes, ASIDE, 2013
It was amazing to see how each student used a particular style and organization to portray his or her knowledge of the topic.
Source: ASIDE, 2013
We developed a
quick guide for the students to introduce the basic shapes to drawing
just about anything with a few simple lines or shapes. It also included
four different ways to represent people. Instead of using simple stick
figures, they learned to draw "I," "star," "A," or "bean" people.
Like the sketchnotes done by our 2nd graders, we talked about the organization and layout of ideas to help make their understanding of the facts as clear as possible.
With personal
note-taking, there is a lot of leeway in the selection of information
that lends to the personalization of ideas and content. Unlike other
forms of note-taking, sketchnotes are not scripted in a certain way.
They are much more organic, personal and deliberate.
Source: 3rd Grade Sketchnotes, ASIDE, 2013
In the end,
the students demonstrated a strong understanding of the facts, and they took
equal care in how they wanted to portray their ideas.
We are so excited about the sketchnotes in this post by our
second grade students. Our innovative colleague and friend, Stefani Rosenthal, was thoroughly intrigued
by the process of visual note-taking and wanted to try it to see how this would
help reinforce her students' understanding of different types of communities. Her forward-thinking approach and willingness to collaborate in trying something new paid off in helping her students learn.
Without making it too complicated, we gave the students the
basics about using words, images and design to arrange their pages. Essentially,
we wanted them to understand how the verbal and visual components worked
together to explain the information. Since this was their first attempt at
visual note-taking, it was important to give the students an organizational
structure. Even though they were given some guidelines, we provided plenty of options. What we did not want was a strict set of rules to make the students do it all the same way.
Source: 2nd Grade Student - ASIDE, 2013
Visual note-taking is personal. Choice and decision-making as to what makes sense for each way of learning are keys to the process. It defeats the
purpose if the outcome is scripted.
Design and layout were up to the students. It was important
for them to take ownership of the information and to display it in a way that
made sense to map out their knowledge.
Source: 2nd Grade Student - ASIDE, 2013
Perhaps the most amazing thing to watch was the sheer
quietness that overtook the room as they worked on their pages. You could have
heard a pin drop. The kids' concentration on the process of creating their
pages was truly astounding.
At the end of the lesson, they were so excited to
discuss their work, and they easily shared their ideas to demonstrate their understanding of what they learned. They not only loved the visual note-taking process but
also had fun doing it, and the content stuck.
The best part was that the students went home that day talking about
sketchnoting. Once again, we couldn’t ask for more as teachers.
We’ve had a lot of interest from teachers at our school
about incorporating sketchnotes into their curricula, and we wanted to offer a place to start learning just how simple the process of visual note-taking can be. As mentioned in our previous post, Sketchnoting builds a connection between verbal and visual components. It is a personal form of note-taking that activates the brain in the process much the same as doodling.
We highly recommend visiting Sketcho Frenzy. It provides a
wealth of short video tutorials on many different aspects of the sketchnote process including typography, drawing peeps, tree diagrams, and more.
Sketchnotes are a multi-sensory form of note-taking involving listening, synthesizing and visualizing and can make a
difference in the way students learn. This year we decided to jump right
into using this non-linear approach, and to our surprise the results
were amazing on two fronts.
Source: Student Work - ASIDE, 2013
First, the notes were expressive, creative,
and personal to each student. It involved decision-making on their part
as to how to best layout the information to meet their needs, and the
element of choice was evident in their approach. The second, and perhaps
the most important, rested in the ability of each student to recall
information spontaneously based on the interplay of words and pictures
in their sketchnotes. This process helped them to listen carefully to
the lesson, to build in visual cues to make connections, and to focus
their attention in the physical act of taking notes.
Source: Student Work - ASIDE, 2013
We originally did sketchnotes in pencil and then went over the lines
with black marker. Although it was not time consuming, it lacked
spontaneity and risk-taking. Students tended to erase because of
perceived mistakes, slowing the flow of listening, writing and drawing.
Our first few attempts were done this way before we realized it was best
just to go for it using marker directly on paper. We were totally
pleased with the results, because the focus fell squarely on the
collection of information and less on being exacting. Another side
benefit was how they shared their sketchnotes with each other, ultimately
reinforcing key concepts.
Source: Student Work - ASIDE, 2013
Perhaps the most rewarding thing for us as teachers was when a student
looked up at the end of the period with an amazed look at what she had
just done and said, "I think sketchnoting suits me." She was right and
could explain everything about what was just covered in class using
them. It was clear; visually mapping the information made a world of
difference for her.
Interestingly enough, a group of students who had done a similar
exercise a year before in our early stages of trying to incorporate
visualizations actually recalled the information, but they noticed it was
done differently. They had tons of questions about sketchnotes and were
intrigued to try it themselves. It surprised us just how much designing
and visualizing information helped them retain what they had learned,
and we realized we were onto something. By giving kids another avenue
for note-taking to visually map ideas, it made the content stick.
Essentially, sketchnotes are a form of visual note-taking, combining text and images. This is different from graphic facilitation, which is when one person listens to a group and graphically represents the key points of the discussion, such as with ImageThink and Ogilvy Notes.
To the contrary, sketchnotes are a personal form of note-taking. Both,
however, use the visual thinking process to design information in real
time through words and images to communicate ideas.
In most schools today, the current system of note-taking is a linear
process and, in many cases, a rote process as well. Too often, we have
students take down the information they need from the board, interactive
or not, via handwritten information or PowerPoint slides. The
interaction or engagement with the material is minimal. Sketchnoting is a
higher order process of capturing information. It requires a
combination of listening, thinking, and visualizing at the same time. It goes in a constant circular motion and pushes
the listener to funnel through the information for the most important
parts or patterns. By filtering out the noise, the sketchnoter learns to
look for patterns or an anchor around the main idea to focus on the key
aspects that support it.
Source: ASIDE, 2012
In the workshops we've taken, the instructor had us practice by
listening to a recording or video. Of course, the first line of
resistance might be "I can't draw," but with sketchnotes, you don't need
to be an artist. It doesn't take much practice to learn the basics
of using shapes as people, and with simple, hierarchical visuals, it's
easy to add images in the form of containers, icons, or connectors.
The
visual cues in sketchnotes enhance the recall process. The user
experience with information is broadened, execution is minimal, and
it opens up the design process to think about the relationship between
the text and image. Essentially, it's about organizing
information visually and arranging it in a hierarchy, and this spatial
arrangement of information provides a structural framework for the content.
Source: ASIDE, 2012
Since we've sketched out "The Axis of Education"
as a matrix for what and how we teach, our hope is to continue to seek
ways to build a sense of discovery in helping students learn. And in the
end, what they learn and how they learn can only be advanced by giving
them more opportunities to be creative thinkers. If moving them closer to thinking like a
designer can transform the way they learn, then sketchnotes is one
option we should try.
"educating their head, heart and
hands to reinvent systems, create new types of value, and catalyze
positive change through the business of making."
We dare say, isn't this
what we want as educators for our students, too? From icons to iPads,
our students are constantly immersed in using visual cues to think,
make, and do things.






)